How to Reset Benz VGS3 NAG2 TCU with LAUNCH X431 PRO5?
This procedure resets a Mercedes-Benz VGS3 / NAG2 (7G-Tronic EGS) transmission control unit using the LAUNCH X431 PRO5 on a bench setup. The goal is simple: clear anti-theft personalization, return the TCU to a neutral state, and prepare it for reuse or programming. The job must be done outside the vehicle with stable power and correct pinout wiring — no shortcuts.
Workshop Reality Check (Before You Start)
In real workshop conditions, this job fails for three reasons:
- Wrong pinout on VGS3 bench wiring
- Unstable power supply during erase
- Losing connection mid-process (internet or CAN drop)
If any of these happen, the module can become unresponsive. Set up properly first, then start the software.
Required Setup
Tool: LAUNCH X431 PRO V
Module: Mercedes-Benz VGS3 / NAG2 TCU (EGS 7G)
Mode: Bench only (module removed from vehicle)
Power: Stable 12V regulated supply (do not rely on battery)
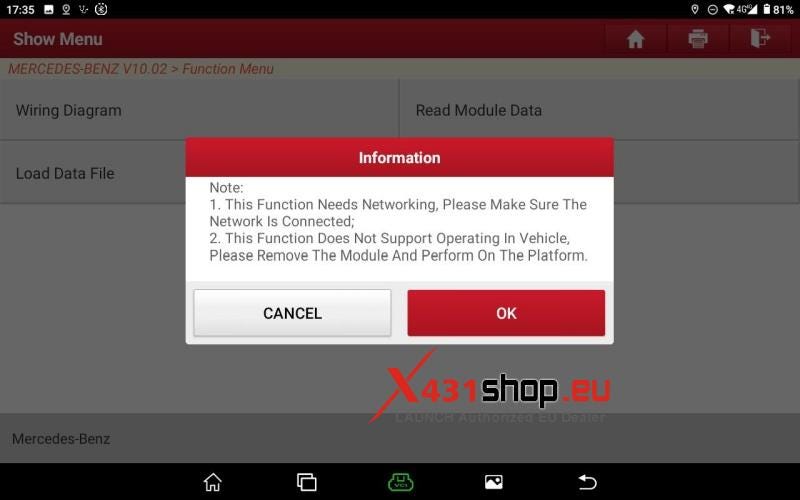
Network: Stable internet (required for anti-theft function)
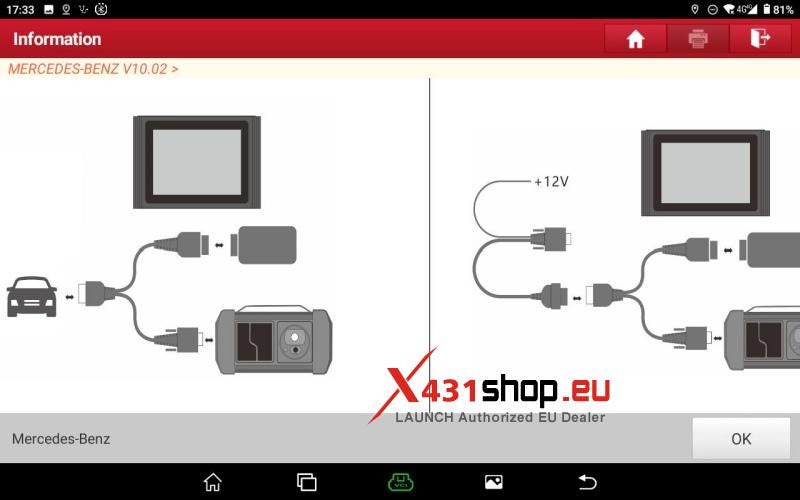
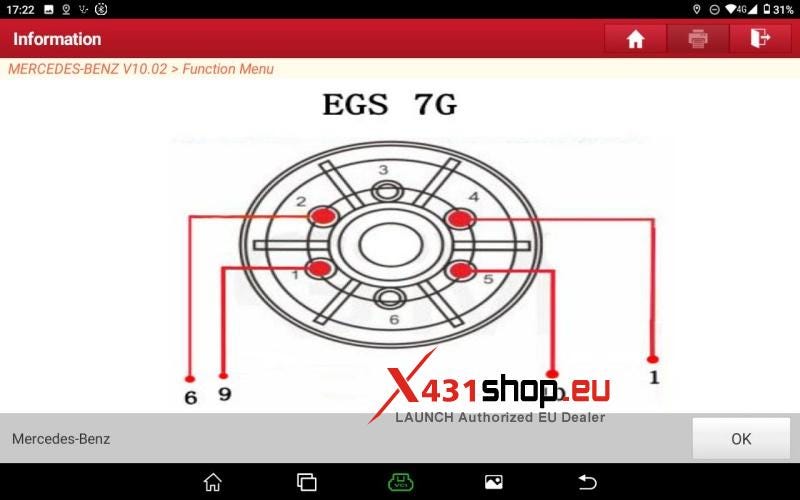
Wiring: Correct EGS 7G / VGS3 pinout diagram

Step 1 — Get Into the Right Function
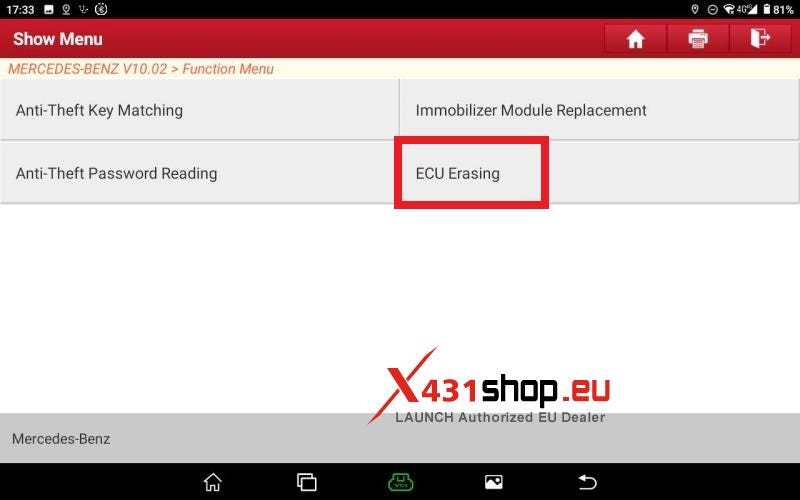
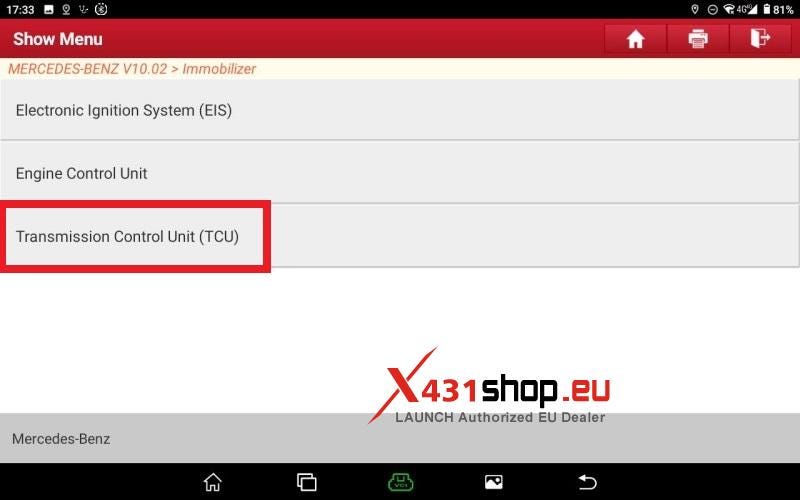
Turn on the LAUNCH X431 PRO5 and go straight into:
Mercedes-Benz Anti-Theft System → ECU Erasing → Transmission Control Unit (TCU / VGS3 NAG2)
No coding, no diagnosis first — just go directly to the erase function.
Step 2 — Bench Wiring (Most Important Part)
Before touching any erase button, the TCU must be stable on the bench.
- Connect power and ground first
- Then establish CAN communication lines
- Add signal/boot lines only if your pinout requires it
- Double-check against EGS 7G wiring diagram
Once wired:
- Make sure PRO5 detects the module
- If communication is unstable here, stop and fix wiring first
This step decides success or failure.
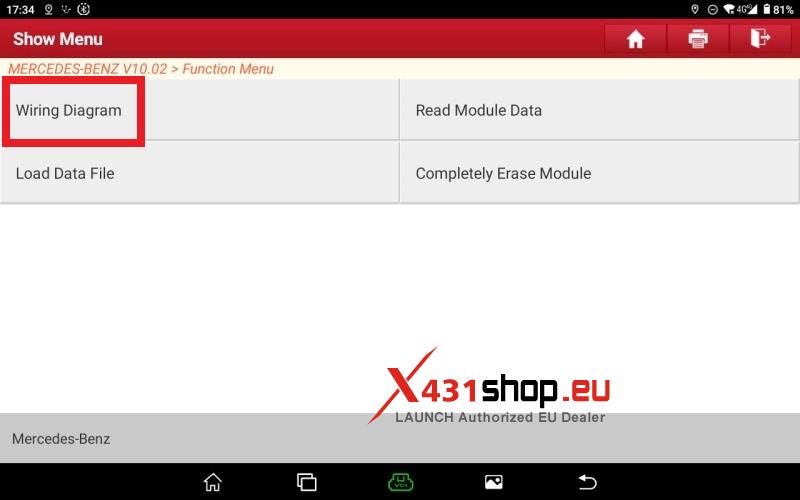
Step 3 — Erase the Module (No Interruptions)
Now start the actual job:
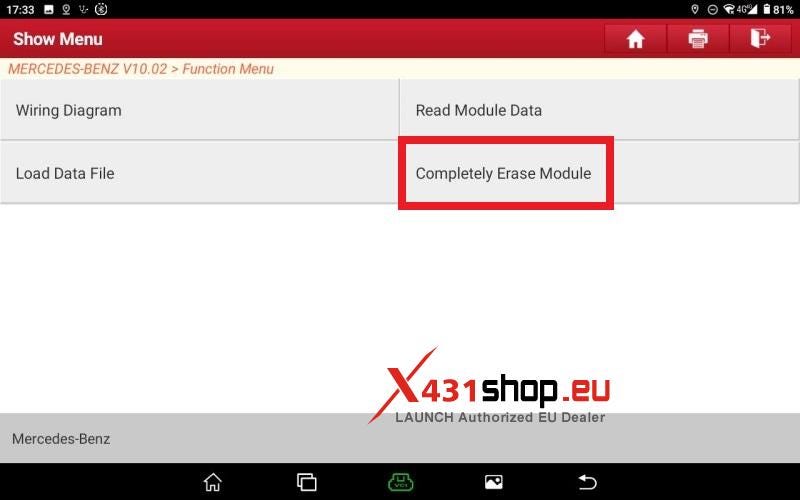
- Select Completely Erase Module
- Confirm all system warnings
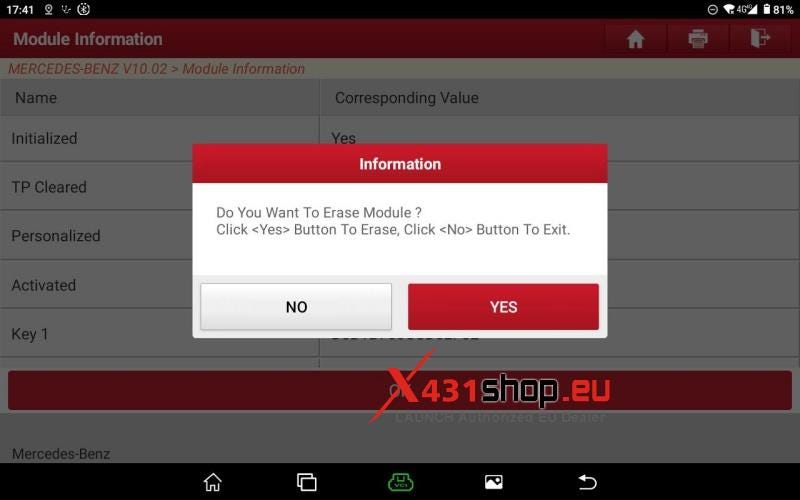
- The tool may show current status (Personalized / Activated)
At this point:
- Decide if you need a backup (usually not in workshop resets)
- Confirm erase operation
Once you press confirm:
Leave it alone. Do not touch anything.
The system will:
- Remove personalization data
- Clear anti-theft binding
- Reset internal module state
You’ll see a progress message like "Erasing Module In Progress"


Step 4 — Wait Until Full Completion
This is where most mistakes happen.
- Do NOT disconnect power
- Do NOT close the app
- Do NOT touch wiring
Just wait until the system finishes and returns a result screen.
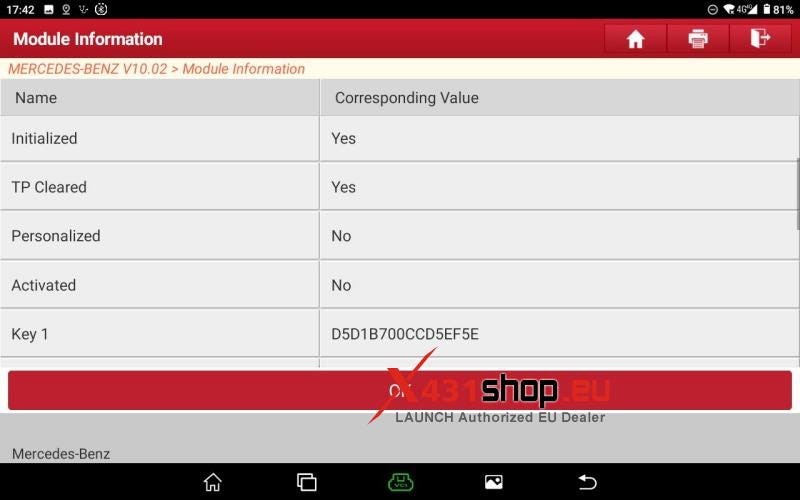
Step 5 — Final Check (This Is Your Proof)
After completion, verify:
- Personalized → No
- Activated → No
- Module status → Reset / Uninitialized
If these values changed correctly, the job is done.
Tap OK and exit.
Workshop Outcome
A successful LAUNCH X431 PRO5 reset gives you:
- Clean VGS3 / NAG2 TCU (no vehicle identity)
- Ready state for coding or adaptation
- Suitable for reuse, cloning, or replacement workflow
Technician Notes (Real-World Tips)
- If PRO5 cannot enter erase function → check internet + account authorization first
- If module not detected → 90% is wiring, not software
- If erase fails halfway → power stability is the first suspect
- Never rush bench setup — this is where real technicians lose time, not in software clicks


Comments
Post a Comment